Measuring an exterior door correctly is crucial to maintaining security, energy efficiency, and curb appeal. This guide covers all the steps needed to achieve accurate measurements.
Essential Tools for Accurate Door Measurements
Before starting, gather these tools to measure your entry door accurately:
- Tape measure
- Pencil and paper
- Level
- Square
- Ladder (for taller doors)
- Flashlight (if needed)
Detailed Steps to Measure Your Exterior Door
-
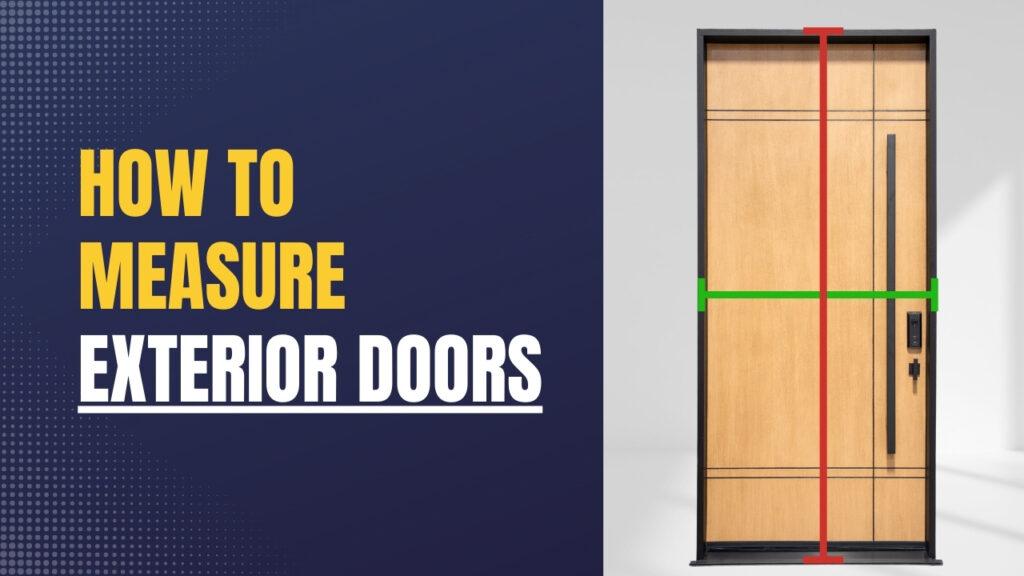
Measure the Door Width: Using a tape measure, start by measuring the width of the existing door. Measure from the inside of one side jamb to the inside of the opposite jamb. Take measurements at the top, middle, and bottom of the door to account for any irregularities. Record the smallest measurement.
-
Measure the Door Height: Measure the door’s height from the floor to the underside of the top door frame. Take this measurement on both sides of the door, as floors can sometimes be uneven. Use the shortest measurement to ensure accuracy.
-
Check the Door Jamb Depth: The jamb depth is the thickness of the wall where the door will be installed. Typically, this is around 4-9/16 inches for standard walls, but it can vary in older or custom-built homes.
-
Measure the Rough Opening: If the old door is already removed, measure the rough opening, which includes the entire space where the door will sit, including the studs and framing.
-
Account for the Threshold: For entry doors, measuring the threshold height is essential to ensure a snug fit and proper sealing against drafts and moisture.
Avoiding Measurement Errors for a Perfect Fit